
.png)


Reactivating Dehydrated Sourdough Starter
- Mountain Girls Homestead

- Dec 18, 2022
- 4 min read
If you have purchased or have been gifted a dehydrated sourdough starter or have made your own dehydrated sourdough, this is a quick step-by-step guide on how to reactivate a dehydrated sourdough starter.
To begin with, I recommend that you purchase a good digital kitchen scale that weighs in grams and ounces (this will give you more precise/accurate measurements). When I bake with my sourdough, I weigh all my ingredients in grams or ounces.
If you have dehydrated sourdough chips, you will want to grind them into course granules (I use a food processor or mortar pestle) before weighing them.
Reviving your dehydrated sourdough starter could take up to 4-8 days, depending on your environment, the temperature of your home, and the flour that you use.
A dehydrated sourdough starter will give you the base that you need to build off of for other recipes. These dehydrated microbes will come back to life once activated by the water, temperature, flour, and wild yeast in the air.
Patience.... working with sourdough requires a lot of patience which allows you, as you perfect your technique, to get a feel for the dough, and how it changes in your hands. In due time, you will reap the rewards of creating beautiful, nutritious, and sustainable baked goods.
Directions:
Day 1 Morning: Crush a few of the sourdough chips into course granules, (like crushed crackers) (weighing in grams) weigh 10 gm of the powder in a glass jar and add 50 gm of lukewarm filtered water. Stir with a spatula until completely combined. Cover and allow the mixture to sit at room temperature for an hour. After an hour, add 40 gm of bread flour (I use King Arthur organic bread flour) and stir with a spatula until completely combined. (This will be thinner to hydrate the starter and activate the yeast bacteria.) Cover and let sit at room temperature for 24 hours.


Day 2 Morning: Combine 20 gm of starter mixture (discarding the rest) and add 50 gm of bread flour and 50 gm of lukewarm filtered water to a clean glass jar. Stir with a spatula until completely combined. Cover and let sit at room temperature for 24 hours.


Day 3 Morning: Combine 20 gm of starter (discarding the rest) and 50 gm of bread flour, and 50 gm of lukewarm filtered water in a clean glass jar. Stir with a spatula until completely combined. Cover and let sit at room temperature for 24 hours.
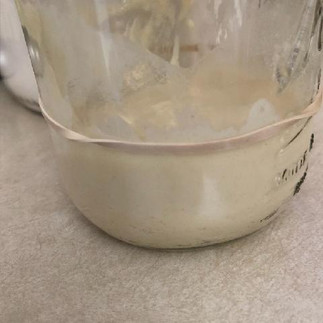
Day 4 Morning: Combine 20 gm of starter mixture (discarding the rest) and add 50 gm of bread flour and 50 grams of lukewarm filtered water to a clean glass jar. Stir with a spatula until completely combined. Place a rubber band over the jar at the starter level and check back in 12 hours.
Day 4 Evening: You should start noticing bubbles and the starter slowly rising. Check back in the morning (wait another 12 hours).


Day 5 Morning: By now the starter should have doubled, based on the location of the rubber band. Add 20 gm of starter, 50 gm of bread flour, and 50 gm of lukewarm filtered water to a clean glass jar and stir with a spatula until combined. Place the rubber band at the starter level, and once the starter is active and bubbly and has doubled, it is mature and ready to use.
Happy Baking!
Disclaimer:
I am not a doctor, nor do I diagnose or treat people. While I seek scientific confirmation of the safety and effectiveness of the herbs and natural remedies I use, remember that using herbs and natural remedies is a personal choice. The information that I share on my blogs are not intended to diagnose, treat or prevent disease. All things on these blogs are my opinions and shared knowledge, based on my research or the research of others. Also, if you have a medical condition, are taking pharmaceutical drugs, or are pregnant, please consult with your physician prior to taking herbs or attempting natural remedies.
Mountain Girls Homestead (MGH) is a personal blog written and edited by Michelle, Jocelynn, Sophia, and Nikole Norman. If you have any questions, please contact us.
This blog accepts forms of cash advertising, sponsorships, or other forms of compensation. In addition, some of the links contained in our website are affiliate links, meaning that if you click on the link and purchase the item, we will receive an affiliate commission. Even though we as the owners receive compensation for our posts and advertisements, we always give our honest beliefs, opinions, findings, or experiences regarding the products and/or topics in our blogs. MGH only recommends products/services that we personally use and believe would add value to our readers lives. MGH adheres to honesty in relationships, opinions, and identity. The compensation received may influence the advertising content (such as through which product banners are displayed onsite) but will not influence the topics/posts made in this blog. That content or advertising space may not always be identified as paid/sponsored content.
The views and opinions expressed in this blog are purely the bloggers’ own. Any product, claim, statistic, quote, or other representation about a product/service should be verified with the manufacturer, provider, or party in question.
Mountain Girls Homestead (MGH) is a participant in the Amazon Services LLC Associates Program, an affiliate advertising program designed as a means for sites to earn advertising fees by advertising and linking to Amazon properties, such as Amazon.com. As an Amazon Associate, MGH earns from qualifying purchases. The products linked from our website to Amazon.com are ones that we use and thus share with our readers. Mountain Girls Homestead may earn a commission from readers clicking on the affiliate links or through qualified purchases and/or website impressions.


Comments